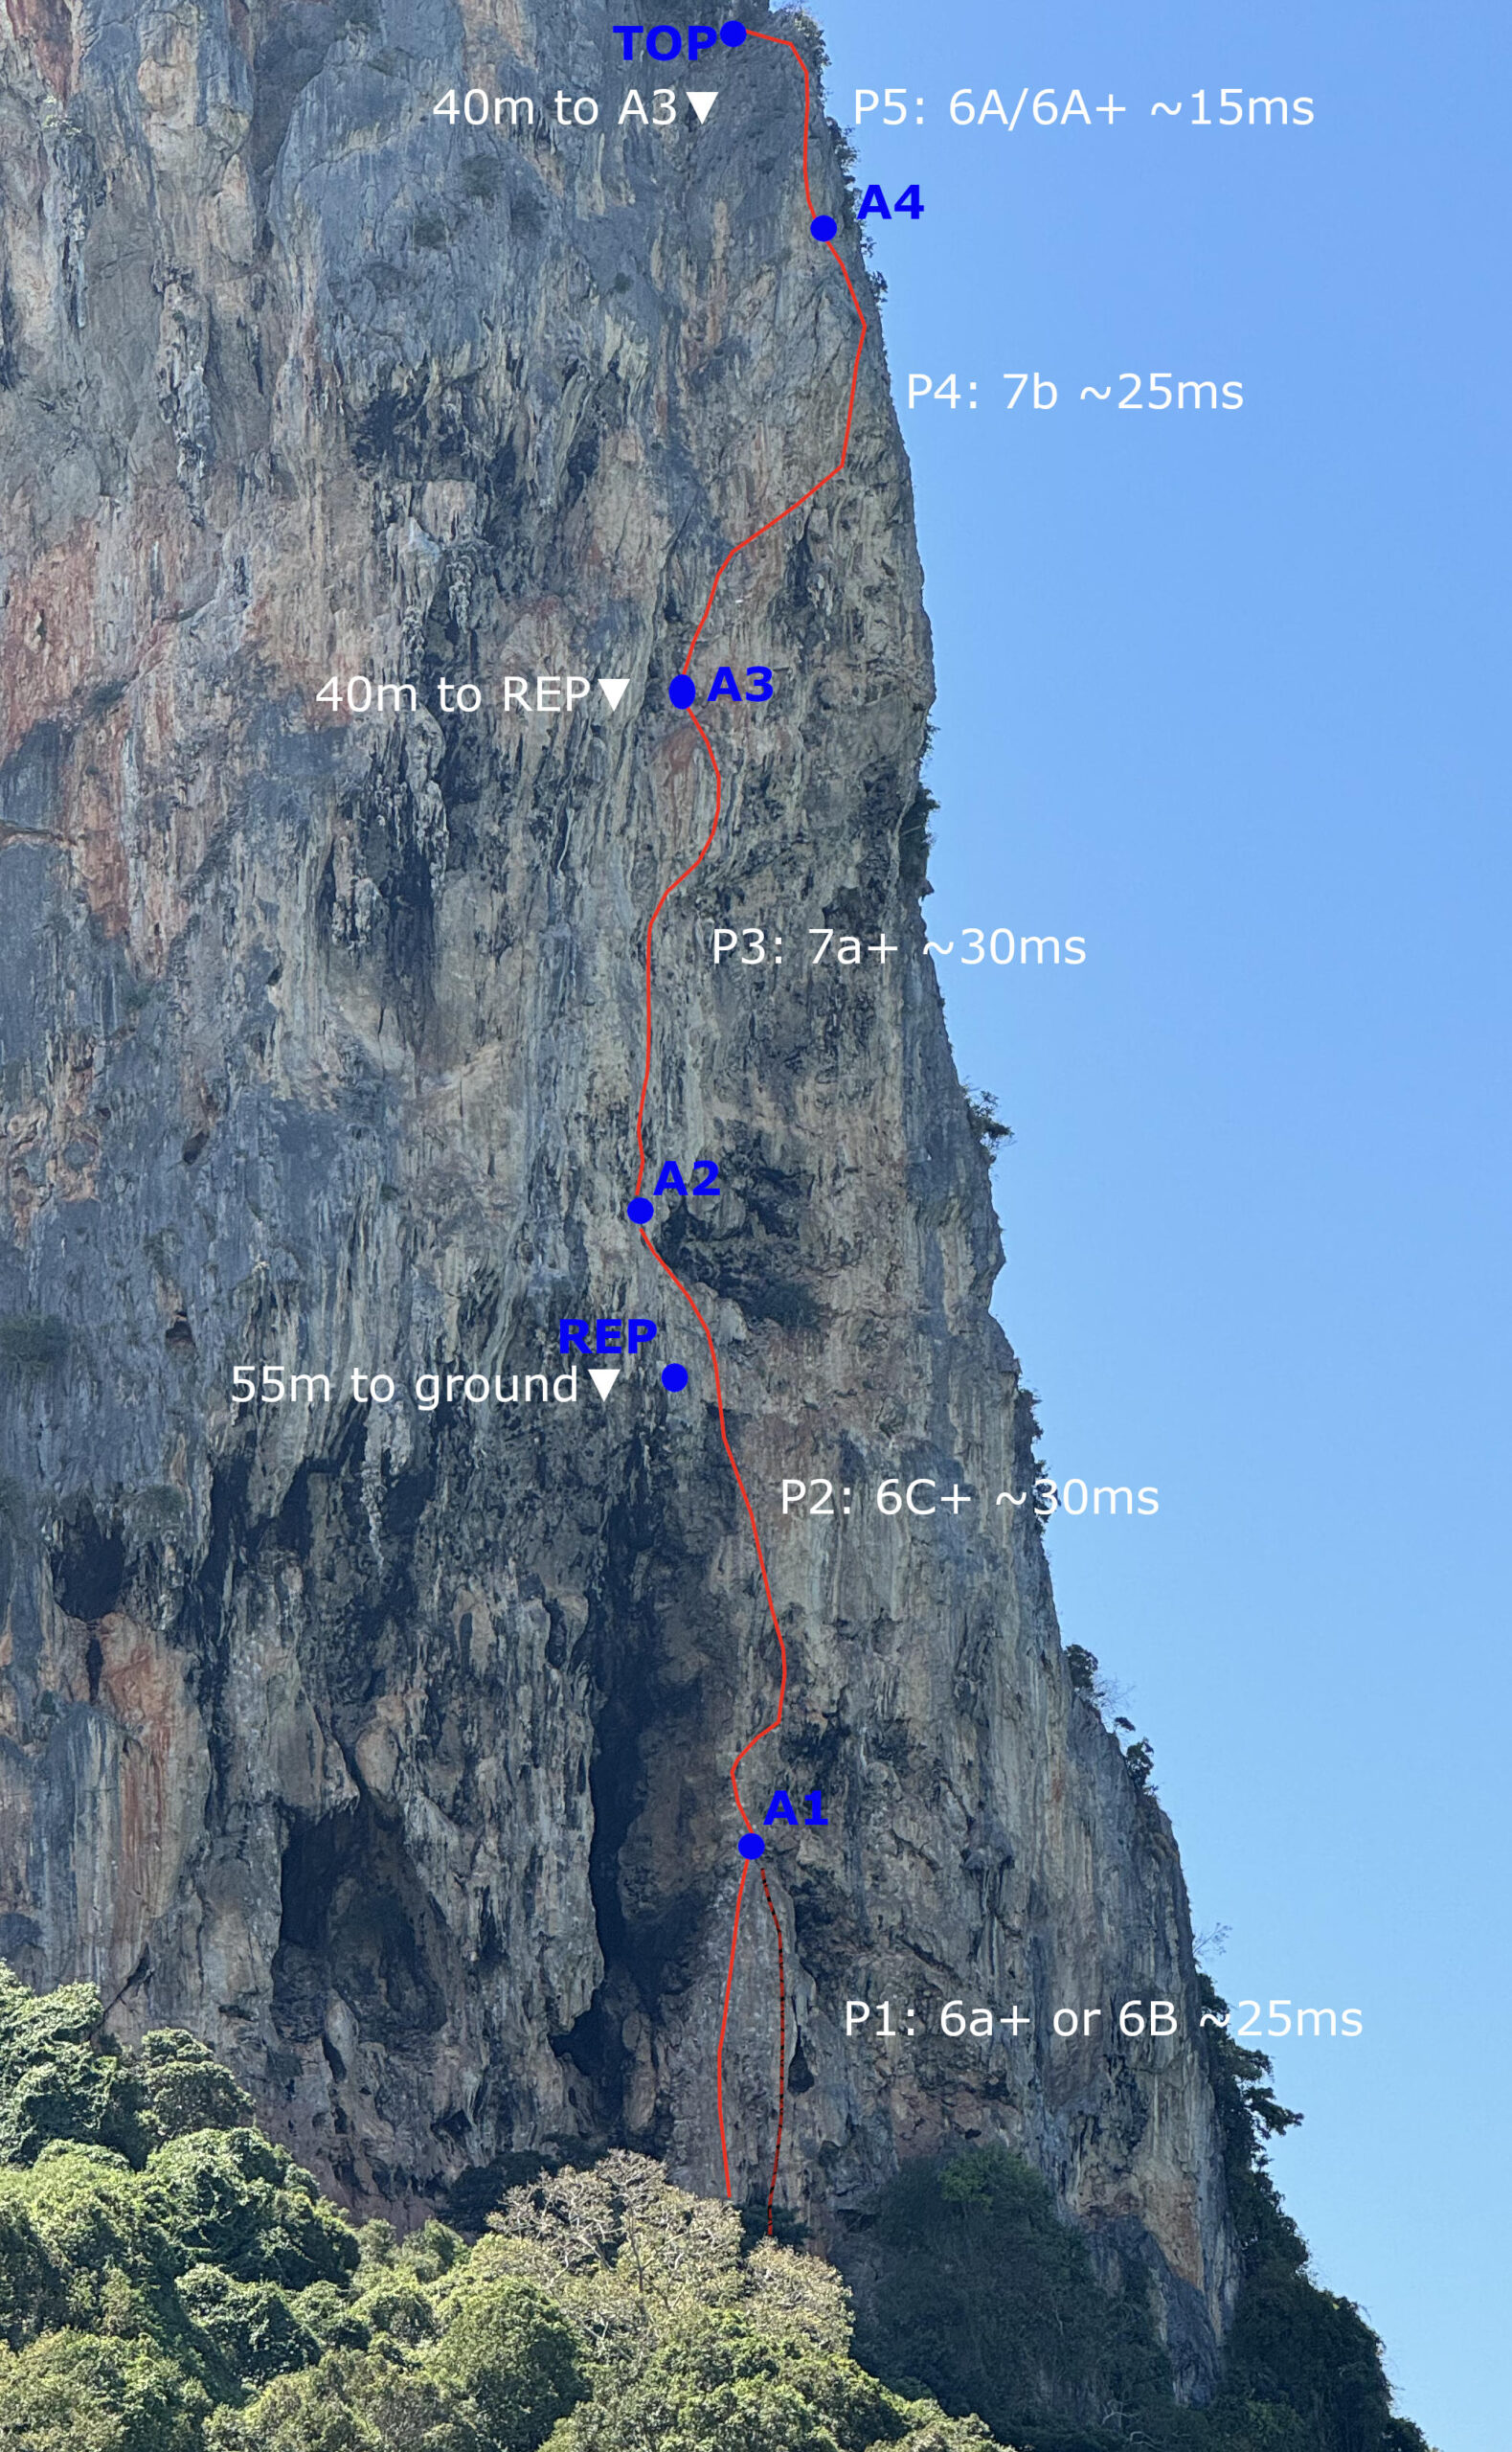
Lord of The Thais 7b
Lord of the Thais is hands down the best multi-pitch route in Tonsai for those looking for a challenge. Its popularity skyrocketed after Sasha DiGiulian and Nalle Hukkataival dropped a film of their send. The icing on the cake is the 7a+ pitch, hailed by many as the most beautiful line in Tonsai at this grade (and it indeed is). The route progressively ramps up in difficulty, so many climbers tackle it just to nail the first two or three pitches before bailing.
Pitch 1 (6a+/6b): – The first pitch of Lord of Thais serves as a warm-up climb, with 6a+ difficulties featuring jugs that are more about finesse than raw power. Due to its accessibility, this pitch often sees traffic from climbers guided by local guides. Alternatively, in such cases, you can reach the base of the second pitch via a slightly more challenging route – Mala Mujer (6b), located to the right of Lord of the Thais’ initial pitch.
Pitch 2 (6c+): – The second pitch deals with medium-sized holds (6b+/6b+) leading up to the crux situated halfway. The remainder of the pitch eases off to around 6a difficulties to the belay station.
Pitch 3 (7a+): The crème de la crème of the entire route. Climbing on incredible coral-like holds up to the crux just before the belay station.
Pitch 4 (7b): – Diagonally ascends to a boulder problem a bit above the belay station, followed by several clips before hitting a stamina-testing sequence almost all the way to the pitch’s station.
Pitch 5 (6a+/6b): – The pitch’s crux is overcoming a small wall with poor holds right above the starting belay. Then, it’s easy terrain up to the TOP.
Access
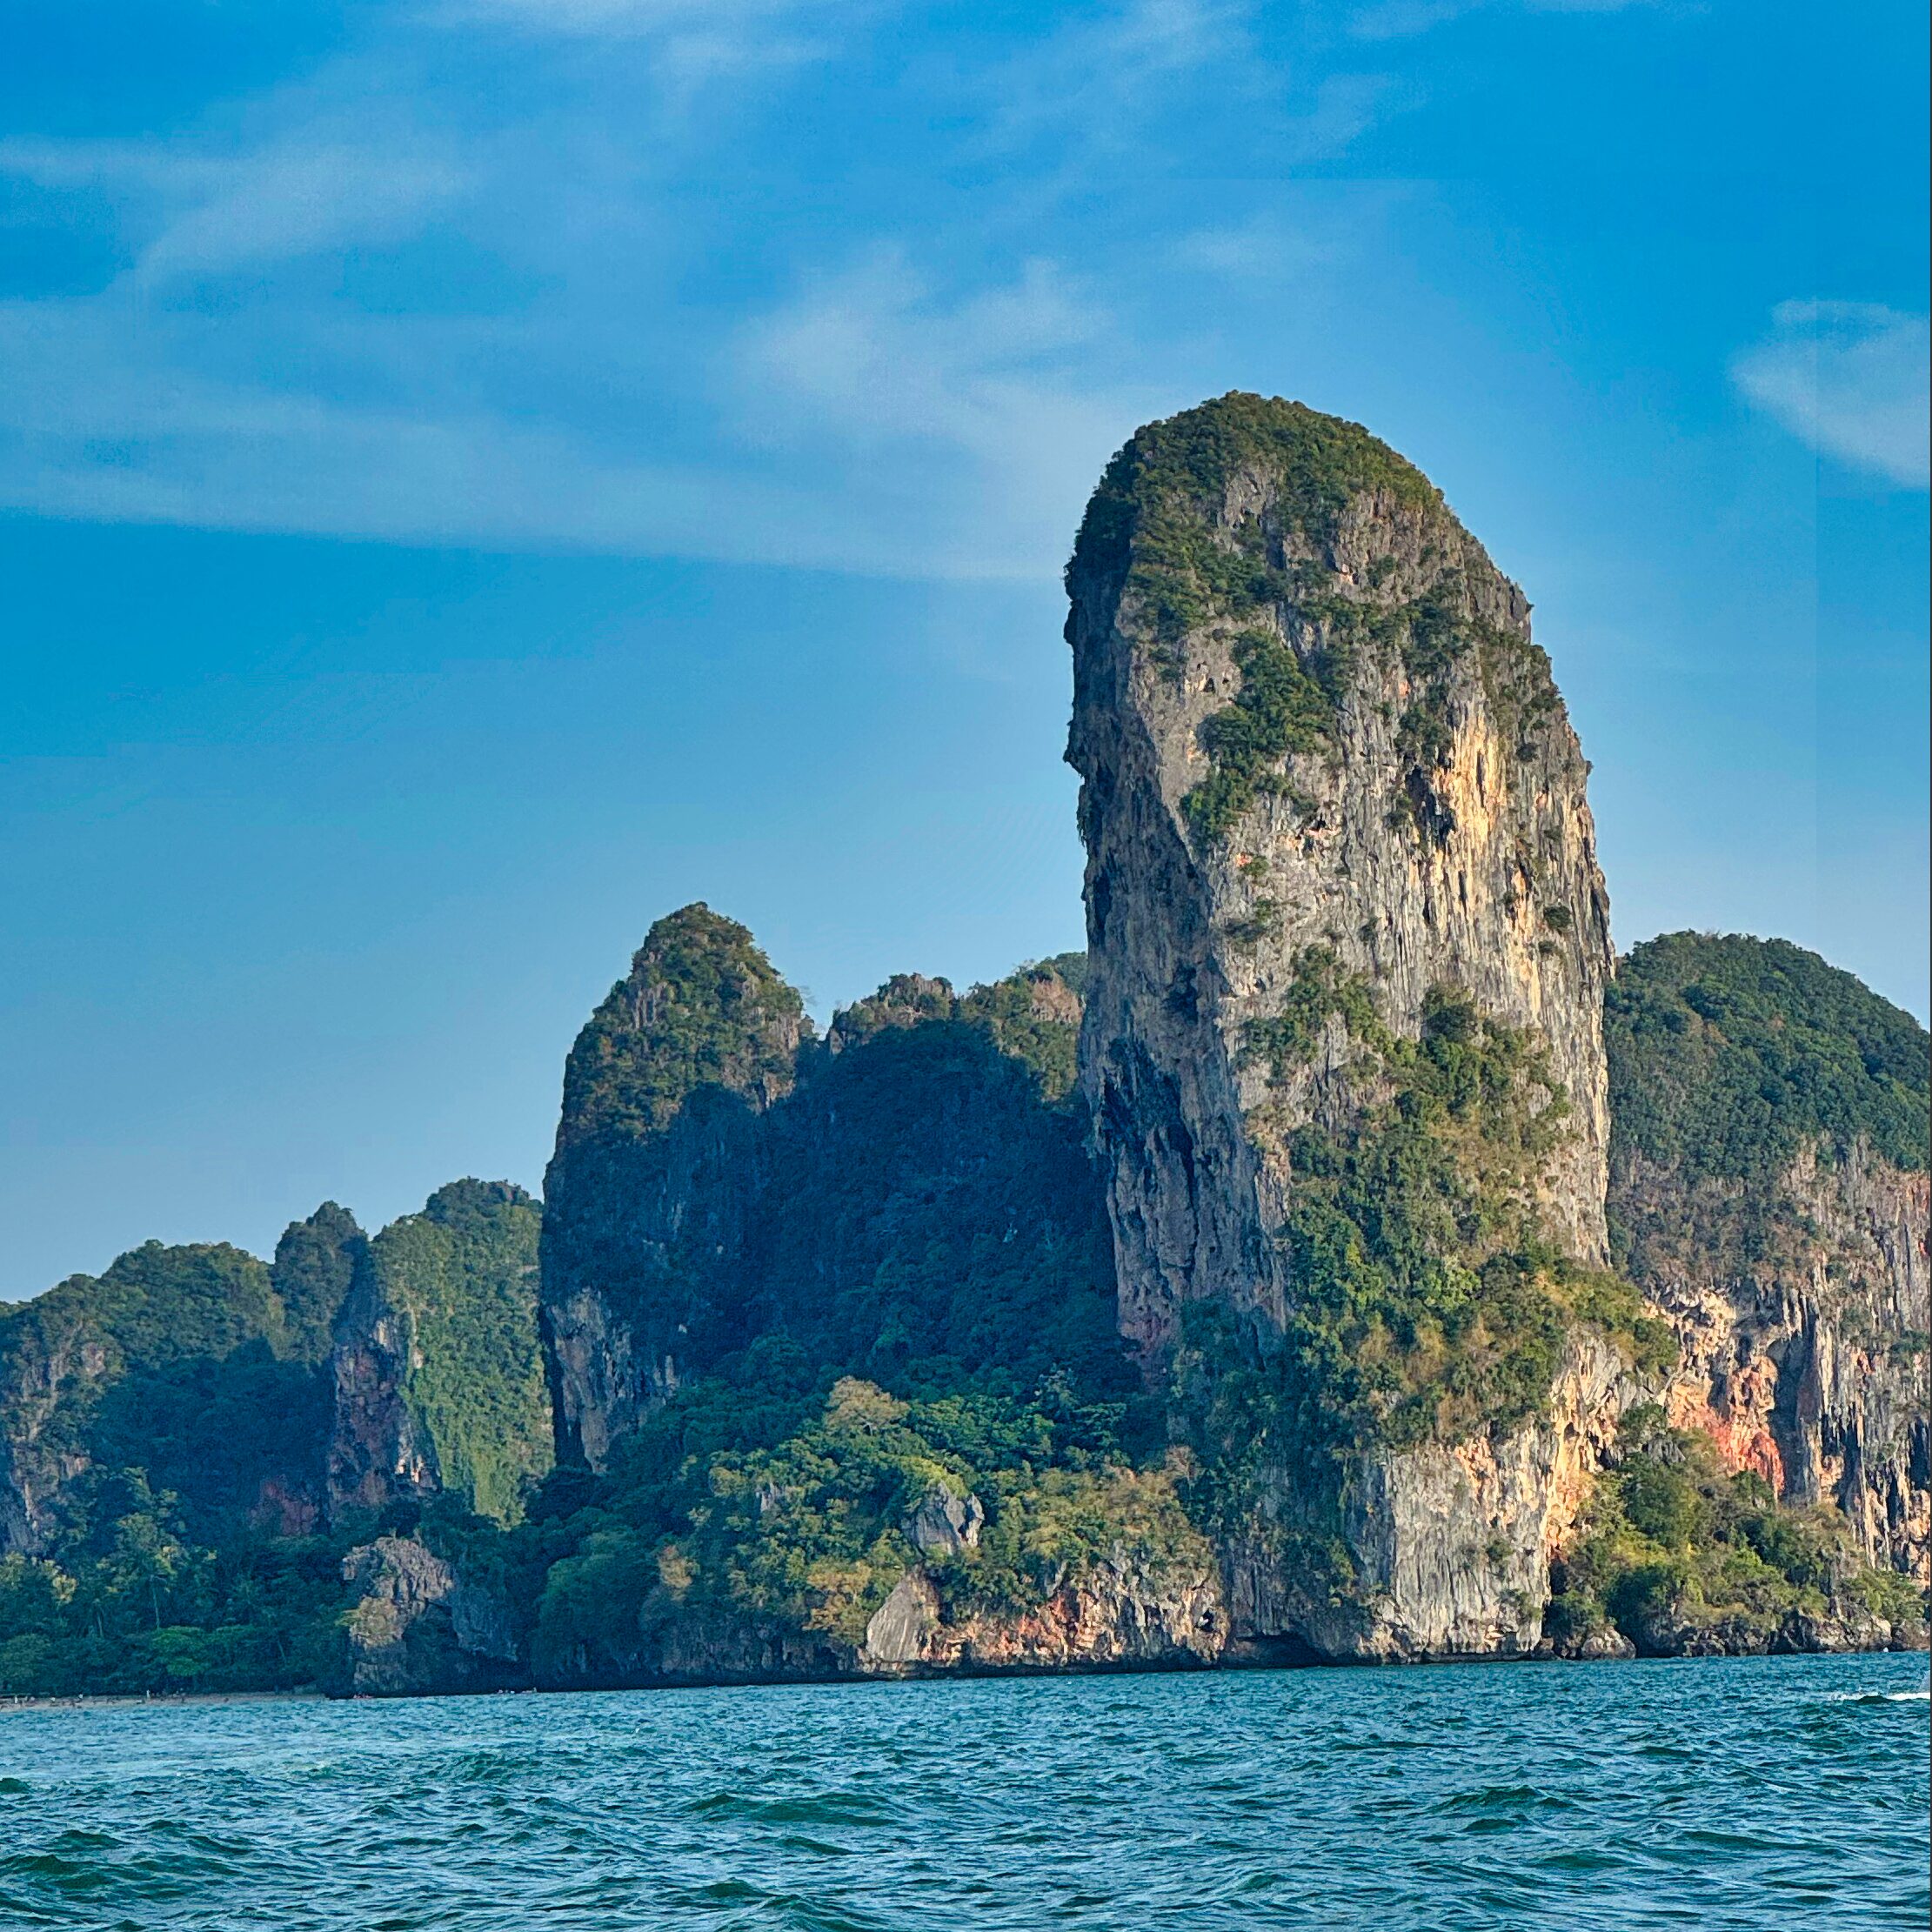
The route is located on Thaiwand Wall – a prominent crag overlooking the bay at Railey West. A major plus is that it stays shaded all day and its exposure means it often catches a cool breeze.
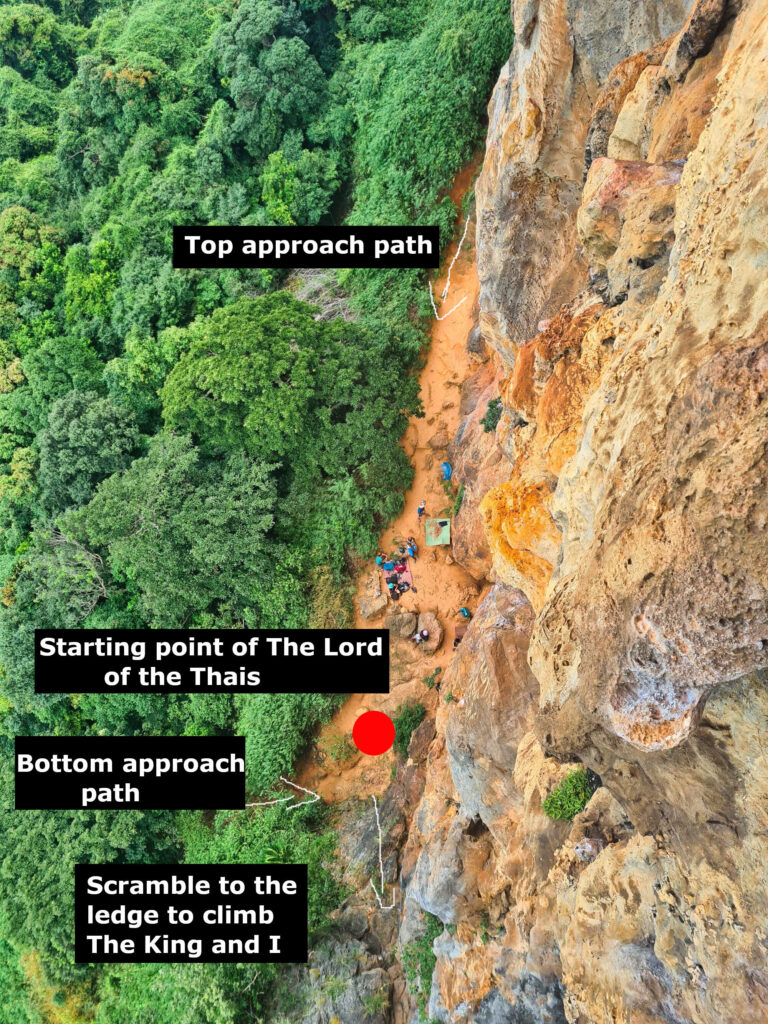
To get to the route, head to Railey West beach and then walk along the beach to its very southern end (what3words location ///twister.suspecting.banally). Right at the end of the beach, there’s a narrow trail leading uphill all the way to the massive face of Wee’s Present Wall. Upon reaching it, turn right and follow a sketchy path through trees and boulders to the base of Thaiwand Wall. The path splits a bunch, and ultimately you can approach the base of Thaiwand Wall either from the top or bottom. The start of Lord of The Thais is almost opposite the lower approach path.
Time and Planning
The route is in the shade pretty much all the time (from December to February) and how long it takes to send basically depends on the climbers’ skills and how well the team syncs up. So, planning when to start the route only really matters in terms of finishing before sunset. It’s also smart to pick a day that’s cool and/or breezy for your climb. True, there’s a risk on windy days that your rope might get whipped into the rock, but the quality of the climb itself is significantly better.
Gear
For climbing, we used standard equipment for sport multi-pitch routes consisting of, in addition to belay devices, a few screw-lock carabiners, a few slings, and prusiks, along with about 16 quickdraws. The optimal rope setup is one 80m rope plus a second one of at least 60m. It is also possible to get away with just one 80m rope or two ropes of at least 60m each.
Rope Management
Just like most of the steeper routes in Tonsai, Lord of The Thais is mostly overhanging and demands back-clipping on the rappel. The standard way (considering having two ropes) to descend from the top to the bottom is in three rappels:
- From the TOP to A3, 40m – the first 20m is vertical, then it gets overhanging, which requires back-clipping into the bolts from the 7b pitch once closer to A3.
- From A3 to REP, it’s another 40m – need to back-clip the whole pitch down. REP is a couple meter below A2 and can easily be spotted from A2
- From REP to the deck, is a 55m.
So, by bringing two ropes, including one that’s 80m, it is not necessary to haul both o them beyond the second anchor (A2) since one can make the raps above on a single 80m rope and then grab the other rope on a way down. If bringing shorter ropes, both of them needs to be hauled all the way to the TOP.
With just one 80m rope, one can rappel from TOP to A3 (40m), then A3 to A2 (~30m), followed by A2 to A1 (30m), and finally from A1 to the ground (25m). But, rapping from A2 to A1 is quite strenuous, and back-clipping there is not just on an overhang but also on a traverse.
Other considerations
In some cases, if the second climber falls on some more overhanging terrain, they may not be able to get back to the wall. In such a case, the only option (other than getting external help) is for the second climber to prusik up the rope – so it might be quite important to have the proper gear and skills to jug a rope/ropes.